Our Git Workflow: Forks With Feature Branches
Originally posted on x-team.com
Git has become a popular version control system and one we've embraced. For a lot of dev teams though, starting to work with a brand new system raises a lot of questions, the most important being how to setup a good workflow.
There are many opinions on this subject, and it takes time to wade through all of them. The "Forking with feature branches workflow" is one workflow that has been adopted by a very large crowd of open-source developers, including us.
This workflow is characterised by the fact that each of the developers working on the project is based on two repositories: 1. The main, common repository, which is the central place for every developer and 2. His own repository, which is the clone of the main one, called fork.
There are a lot of advantages to this workflow, such as very thoughtful code merging, which can be watched by a chosen person (and could be the only person having the permissions to modify the main repository). Another is pull requests, which let developers perform code reviews with ease.
All of the following examples are based on GitHub‘s service, but the workflow itself can also be easily applied to many other services like BitBucket or Beanstalk.
Setting up your project
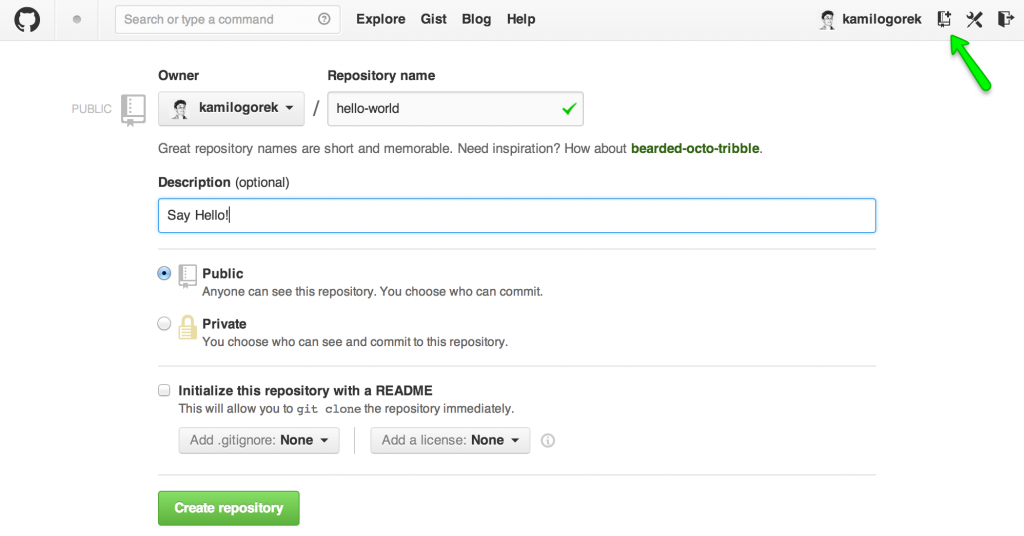
Starting your new project is relatively simple. You just have to create a new, empty repository:
or if you want to use your own server:
$ ssh user@host
$ git init [path-to-repository.git] --bare
And then you have to push locally created codebase to finish initialisation:
$ mkdir [your-project]
$ cd [your-project]
$ git init
$ git remote add origin [repo-url]
$ touch README.md (to create README file)
$ git add README.md
$ git commit -m "Init commit"
$ git push origin master -u
Where [repo-url] is either the url to your server with specified repository url or url from GitHub, which can be found in the sidebar of the repository view.
Before starting our work, it'd be good to create a ‘develop' branch, on which we'll base our work. We can do this right from the GitHub interface:
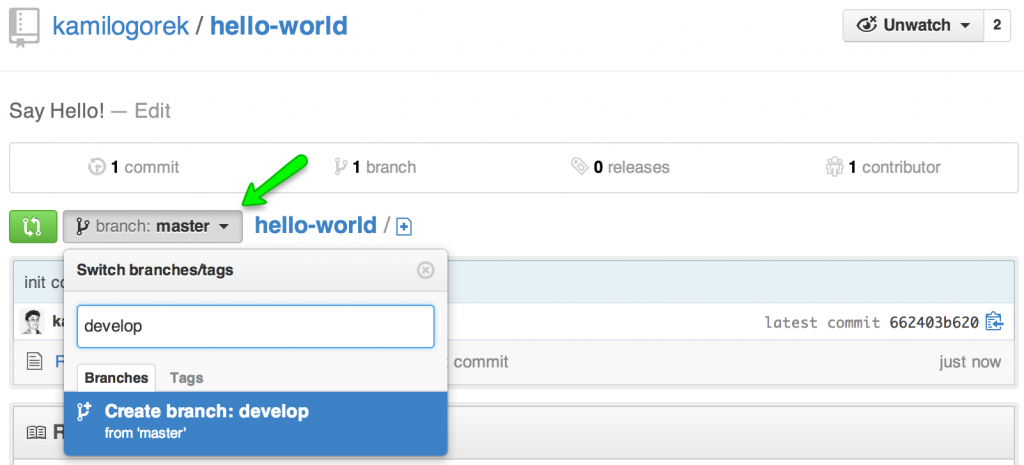
or using terminal:
$ git checkout -b develop
$ git push origin develop -u
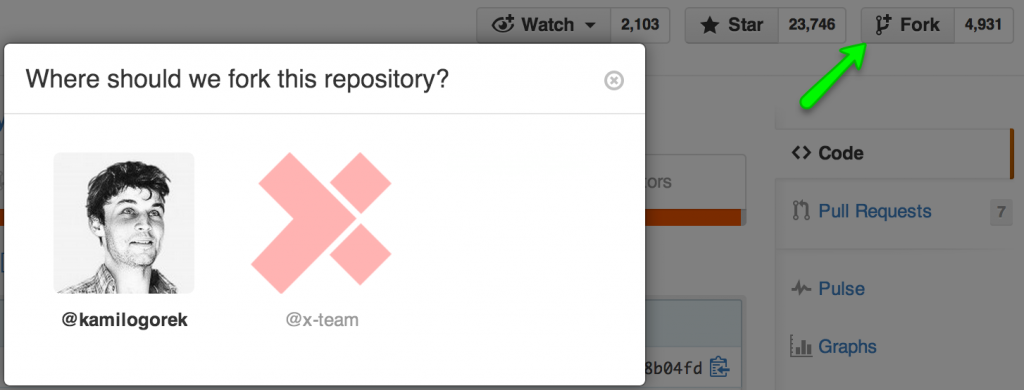
At this point, all of the developers working on the project are able to create a fork of the project and clone it, so they'll have a separate GitHub changelog available.
$ git clone [forked-repo-url]
and set in a remote, which points to the main repository. It's common to use ‘origin' as the name of the forked repository and ‘upstream' as the name of the main one, so we'll stick to it.
$ git remote add upstream [main-repo-url]
If you're wondering whether you should use ssh or https, you can read the following book's chapter, which will tell you the differences between those two.
Git on the Server – The Protocols
At this point you should already have 2 branches, master and develop in the main repository, as well as you should be able to fork it. Now we're all set up and we can start our work.
Branching model
In our workflow we distinguish four types of branches:
- master – main branch on which you should have only fully stable, working releases of each iteration of your project
- release – branch serving as a testing space before releasing new version of a project
- develop – this is the place where all development happens
- feature/issue/fix-branches – a single branch which can be created by any developer, which is responsible for new features, fixes or reported bugs. The name convention is straight forward, every branch name should be prependend with proper prefix: feature-, fix- or if it's a branch created based on any issue tracking system, then it can be named after specific ticket number for example artf89349, feature-photos-model or fix-videos-controller.
Creating new functionalities
To start working on a new feature, first you need to create a new branch, at the same time making sure that your local repository is up to date with respect to the main repository.
It'll allow you to work on the most recent code, which will reduce the likelihood of merge conflicts in the future, if your work will take longer then you thought it will:
$ git checkout develop
$ git pull upstream develop
or:
$ git checkout develop
$ git fetch upstream
$ git merge upstream/develop
and create a branch itself:
$ git checkout -b [branch-name] [branch-head]
The command above will create the new branch with [branch-name] name and you'll be instantly moved to it.
The next parameter [branch-head] is optional and it's used to indicate git from which place it should create the branch. It consists of branch name or commit hash (which can be found using git log command). If you won't pass it, the branch will be created based on the branch you're currently on.
Current branch on which we're on can be found using git branch -l command, where current branch is marked with an asterix sign:
$ git branch -l

master
* develop
release-v0.1
artf89349
feature-photos-model
fix-videos-controller
Contributing to other developers' forks
Sharing code with other developers is as simple as working with any other repositories. The only thing that you need is to add the remote developer repository from which you want to take from or send the change to:
$ git remote add [repo-name] [repo-url]
The rest of the commands are unchanged.
To start working on another branch, first we need to pull it from the repository:
$ git fetch [repo-name] [branch-name]
Where [branch-name] is optional and when not specified, all branches will be fetched (those branches won't be visible on your local branches list, but you will be able to checkout to them anyway).
The entire flow of cooperating with other developers is completely isolated, so you're able to work together on one functionality without sending it to the main repository.
Cleaning up your branches
At the end of some phase of work, when you're ready to send your changes to the repository, you should clean up your branch before doing so. This should be the process you always take care of and not omit when possible. Otherwise your git history will look like one big mess and it'll be really hard to find changes or look back on what has been done, and you won't be able to roll back your changes as easy as you'd like to.
However, this process may sometimes be difficult and confusing, as you need to learn about using a lot of new git functionalities like resetting, cherry-picking, rebasing, squashing and amendings, which won't be described here.
But have no fear, there are a lot of great resources you can go to and read about these functionalities. Such as: Pro Git chapters:
Undoing Things Branching Rebasing Rewriting History
Pushing the changes to the repository
Sending the changes to the server, whether it's the main repository, our fork or a copy of any other developer's is always performed in the same way (as long as we have write permissions).
If we want to push our committed code, we just need to specify the target repository and branch name:
$ git push [repo-name] [branch-name]
Where [repo-name] is the name of the previously added remote repository.
It's worth noting that when we're pushing our code, we can specify -u flag (or --set-upstream), which will point our local branch to the remote one. This will let us use a shortened version of the push command (simple git push), without specifying any parameters and git will still know where to send our code.
Working on purpose-specific branches
Master, release and develop are branches which have an advanced, imposed way of working.
Master The main branch that contains only fully stable, already released iterations of project. It should get the code from the release branch only.
Every merge you perform on this branch should mean that you finished the next big milestone in your project and it should be properly tagged, which will help you keep your repository clean.
Tags are a kind of checkpoint, which you can freely use in any place and on any branch. They allow you to easily view and eventually roll back your changes to those marked places.
To tag the branch, just enter the name you'd like to use as a parameter to the git tag command:
$ git checkout master
$ git tag -a release-v0.1
$ git push upstream master
If there's a situation when you find a major bug that needs to be fixed immediately, you're allowed to create a hot fix branch which would be diverged from the master.
$ git fetch upstream master
$ git checkout -b hotfix-gallery-photos upstream/master
However, keep in mind that after merging it back to master, you have to do the same for the develop branch to keep it in sync.
$ git checkout master
$ git merge hotfix-gallery-photos
$ git push upstream master (push straight to upstream only if it's really urgent fix)
$ git checkout develop
$ git merge hotfix-gallery-photos
Release Branches used for testing and all the finishing touches before releasing the project to the world. They're diverged from the develop branch.
$ git fetch upstream develop
$ git checkout -b release-v0.1 upstream/develop
If it turns out that you find any bugs, you are free to fix them using fix branches created from the newest release branch. But always keep in mind to sync those changes back to develop, the same way as with hotfix branches mentioned in the master branch section above.
$ git fetch upstream release-v0.1
$ git checkout -b fix-broken-tiles upstream/release-v0.1
It's up to you whether you use pull requests here, but I highly encourage you to do so. Release branches are usually long-living things, so there's no rush and you should perform the code review as often as possible.
Develop Branch on which the main development happens. This is the place from which you should always create your new feature/fix branches and this is the place where you should send all your pull requests for a code review.
Pull requests and code review
When we will finally complete our work on a new feature/fix, it's time to present our code to the rest of the team and incorporate it into the main repository.
As I mentioned, one of the biggest advantages of this workflow is the ability to use pull requests, and thus perform code reviews in an easy and accessible way.
To send our changes, we need to visit the page where we'll find our fork: http://github.com/[user]/[repo-name]
Go to the "Pull requests" tab, select "New pull request" and set up the request we want to perform:

After all of this, you'll see a nicely built description of the changes you made in your branch, list of commits, accurate code diffs, as well as a number of files/lines changed.
All the commits, as well as all of the pull requests should now be reviewed and commented on by the developer responsible for code reviews. It's up to you who it'll be. It can be the one person specifically chosen for this job or just any other developer working with you on a project.
Once the code has been verified and is valid, it can be merged into the repository. The whole operation is fully automatic, we just need to press the "Merge pull request" button.
If, however, your changes will not go through the watchful eye of your co-workers, you need to fix all the pointed issues. To do this, all you need to do is make changes on the branch you created the pull request from and commit the changes to your own repository:
$ git checkout [branch-name]
(fix all the issues)
$ git commit -m "Commit message"
$ git push origin [branch-name]
The newly created commit will be automatically added to the current pull request without any interference.
Merge conflicts
Sometimes another developer makes changes to the main repository which will include editing files we're also working on.
In this case, it often happens that there will be so-called conflicts, which means that git is not able to automatically merge our changes. We then have to help git and do it manually.
To do this, you have two options to choose from: 1. Either combine your changes to the develop branch and push it directly to the main repository, which will result in an automatic closing pull request:
$ git checkout develop
$ git pull upstream develop
$ git merge [branch-name]
(resolve conflicts)
$ git add -A
$ git commit -am "Resolved conflicts"
$ git push upstream develop
or 2. We can merge develop updates to our own branch and append them to pull request:
$ git checkout [branch-name]
$ git fetch upstream
$ git merge upstream/develop
(resolve conflicts)
$ git add -A
$ git commit -am "Resolved conflicts"
$ git push origin [branch-name]
Basically, conflicts are lines of code that were changed by more then one developer in the same time, therefore they cannot be merged together. They look like this:
(function () {
<<<<<<< HEAD
    var foo = 'Hello Mom!';
=======
    var foo = 'Hey Dad!';
>>>>>>> fix-foo

    return foo;
})();
This is a simple conflict between branches we want to merge changes to (marked as HEAD) and branch named "fix-foo".
To resolve this conflict we need to settle how to merge together this code and remove redundant <<< and === markers.
After resolving, this file could look like this:
(function () {
  var foo = "Hello Mom!";

  return foo;
})();
You'll know that there are conflicts when trying to merge or pull branches because git will tell you that. Plus, you'll be able to just check this using git status command and you'll find that some of the files are not merged:
Unmerged paths:
  (use "git add <file>..." to mark resolution)

    both modified:      foo.js
When you resolve your conflicts you just need to add those conflicted files back using git add [file-name] or git add -A (if you want to add all files at once) and you're good to go.
Deleting redundant branches
After your work has been successfully incorporated into the main repository and you don't need your branch anymore, you can safely remove it.
To do this locally, you just have to specify which branch to remove:
$ git branch -d [branch-name]
or if there are some uncommitted changes that you won't need anyway, you have to force deletion by passing uppercase -D flag:
$ git branch -D [branch-name]
If you want to remove your remote branch, you do this by prepending a colon sign before branch name like this:
$ git push origin :[branch-name]
Whole workflow example in a nutshell
- Initialize new repository
- Create base develop branch
- Fork repository
- Clone your fork locally:
$ git clone [fork-repo-url]
- Add upstream remote:
$ git remote add upstream [main-repo-url]
- Create feature branch diverged from develop branch:
$ git checkout -b [branch-name] develop
- Get your work done and commit it to your repository:
$ git add [files-to-add] or git add -A
$ git commit -m "Commit message"
$ git push origin [branch-name] -u
- Create pull request to main repository
- Ask someone or wait for code review
- Fix your issues or conflicts if there are any
- Get your code merged to the main repository
- When it is time, merge develop branch to release branch by creating a pull request or merging it manually:
$ git fetch upstream
$ git checkout -b release-v0.1 upstream/develop
$ git push upstream release-v0.1
- Test your branch, fix it if necessary by creating fix branches diverged from release:
$ git fetch upstream
$ git checkout -b [fix-branch-name] upstream/release-v0.1
- Make pull requests with fixes, get them passed through code review and merged
- After everything is done, merge release branch to master (or create pull request) and tag it as a next successful milestone in your project:
$ git checkout master
$ git fetch upstream
$ git merge [release-branch]
$ git tag -a release-v0.1
$ git push upstream master
- Repeat whole process
I hope that this will bring you closer to the idea of working with a git environment, help you decide to use it in your future projects and make your life much easier.